
Crochet bags Crochet Summer Bag

Why Every Crocheter Needs a Crochet Summer Bag in Their Collection
There is something uniquely satisfying about carrying a bag you made with your own hands. A Crochet Summer Bag combines practicality with the joy of wearing your creativity. Whether you are heading to the beach, running errands on a warm afternoon, or packing a picnic with friends, a handmade summer bag adds a personal touch that no store-bought accessory can replicate.
Summer is the season when lightweight, breathable accessories truly shine. Cotton yarns, linen blends, and even tropical-weight synthetics come alive in bright colors and cheerful textures. Crocheting a summer bag gives you the freedom to choose exactly the size, shape, color, and stitch pattern that matches your style. The result is always a one-of-a-kind piece that turns heads wherever you go.
If you have never tried making a bag before, do not worry. This guide will walk you through everything you need to know, from selecting the right materials to finishing touches. Even if you are an experienced crocheter, you will find fresh ideas and helpful tips here to elevate your next project.
Choosing the Right Yarn and Hook for Your Summer Bag
The foundation of any great Crochet Summer Bag starts with your materials. Since summer bags need to be lightweight and durable, yarn choice matters more than you might think.
Yarn Weight and Fiber
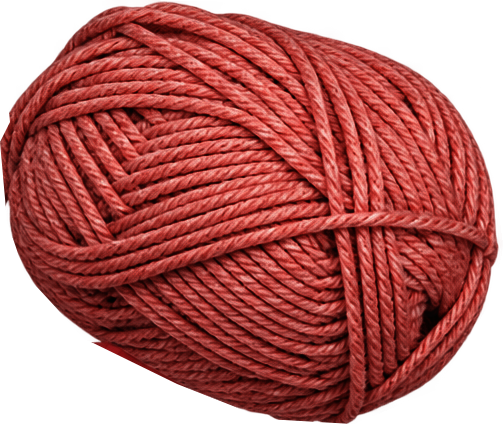
Cotton yarn is the go-to favorite for summer bags. It is breathable, holds its shape well, and comes in every color of the rainbow. I love using size 4 worsted weight cotton for bags because it creates a fabric that is substantial enough to carry items without being bulky. For a lighter, more open weave, try a size 5 bulky cotton or even a cotton-linen blend.
If you prefer something softer against the skin, a bamboo yarn or a cotton-acrylic blend can work beautifully. Just keep in mind that the more synthetic content a yarn has, the less breathable it will be on a hot day. For a true summer feel, prioritize natural fibers.
Hook Size
Match your hook to your yarn label recommendation, then go half a size up if you want a looser, more textured stitch pattern. A larger hook creates bigger gaps between stitches, which can give your bag a pretty lacy feel while still keeping it functional. For worsted weight cotton, I typically use a 5.0 mm to 5.5 mm hook.
Color Choices
Summer begs for vibrant colors. Think sunny yellows, ocean blues, coral pinks, and tropical greens. You can also go bold with ombre yarns or mix two complementary colors for a striped or gradient effect. Neutral tones like beige, cream, and sand work just as well if you want something that pairs easily with any outfit.

Stitch Patterns That Work Beautifully for a Summer Bag
The stitch pattern you choose will determine both the look and the structure of your Crochet Summer Bag. Some stitches create dense, sturdy fabric, while others produce open, decorative textures.
Basic Stitches for Beginners
If you are new to bag-making, start with single crochet or half double crochet. These stitches create a tight, firm fabric that holds its shape well. A simple single crochet tote is forgiving, easy to work up, and looks clean and polished.
Textured Stitches for Character
Once you are comfortable with the basics, try shell stitches, popcorn stitches, or bobble patterns. These add visual interest and a slightly raised texture that makes the bag feel more handcrafted and distinctive. A shell stitch panel across the front of a bag can look absolutely stunning.
Granny Square Construction
Granny squares are a classic choice for summer bags. They are modular, which means you can work multiple squares and join them into a flat panel or even a three-dimensional shape. Granny square bags have a playful, retro charm that is hard to beat.
Many crocheters love incorporating the traditional granny square motif into modern bag designs. If you want to explore how granny squares translate into bag projects, this Crochet Beach Bag tutorial shows a wonderful way to adapt the classic motif into a functional summer accessory.
Step-by-Step Guide to Making a Simple Crochet Summer Bag
Let me walk you through the basic construction of a straightforward rectangle-style bag. This pattern works for beginners and can easily be adapted for more advanced crocheters.
What You Will Need
- Worsted weight cotton yarn (approximately 400 to 500 yards)
- Hook size 5.0 mm to 5.5 mm
- Yarn needle for weaving in ends
- Two buttons or magnetic clasps for closure
- Optional: lining fabric and batting for structure
Body of the Bag
Start with a foundation chain that matches your desired bag width. For a medium-sized tote, around 30 to 35 stitches works well. Single crochet across the row, then chain one and turn. Continue until your piece reaches the desired length, typically around 15 to 18 inches.
Remember to keep your tension even throughout. Uneven tension can cause the bag to curl or distort, making it harder to sew together later. If you notice your stitches getting tight, take a breath and consciously relax your grip on the yarn.
Adding the Sides and Bottom
To create the bag's depth, fold your rectangle in half with the right side facing out. Single crochet through both layers along the side edge. Then work across the bottom corner to form the base. This gives the bag the three-dimensional shape you need.
Handles and Closure
For handles, you can crochet two long straps using the same yarn and hook, or use leather straps, ribbon, or even purchased bag handles. Attach them securely at the top edge of the bag. A simple button closure or magnetic snap keeps everything in place while adding a finishing detail.

Creative Variations to Make Your Bag Truly Unique
One of the best things about crocheting is how easy it is to customize. Your Crochet Summer Bag can be as simple or as elaborate as you want it to be.
Add Applique or Embellishments
Crochet flower motifs, leaves, or geometric shapes and stitch them onto the front panel of your bag. These small additions can completely transform a basic design into something that looks intricate and special. Even a single flower applique adds a beautiful focal point.
Try Colorwork
Introduce two or three colors by changing yarns every few rows, or try a tapestry crochet technique for geometric patterns. Colorwork does not have to be complicated. Even a simple stripe pattern gives the bag a designer look.
Experiment with Shapes
Not every bag has to be rectangular. Try a cylindrical bucket bag, a hexagon-shaped clutch, or an angled drawstring pouch. Changing the basic shape is one of the quickest ways to create something entirely new.
If you enjoy the process of building a bag from smaller modules, you might find inspiration in this Crochet Market Bag project, which demonstrates how modular construction opens up a world of design possibilities for bags of all sizes.
Common Mistakes and How to Avoid Them
Even seasoned crocheters run into snags when making bags. Here are some of the most common issues and how to fix them.
- Bag too floppy: Use a tighter stitch pattern, choose a heavier yarn weight, or add a lining with fusible interfacing for structure.
- Handles too short: Measure before attaching. Your handles should be at least 10 to 12 inches long for comfortable shoulder carrying.
- Uneven edges: Count your stitches in every row. Putting a stitch marker at the beginning and end of each round helps maintain consistency.
- Wrong size:** Always make a gauge swatch before starting the full project. The dimensions on a pattern are only accurate if your tension matches.
- Weak seams: Reinforce stress points by crocheting over them twice or adding a small patch of heavier yarn at the corners.
Finishing Touches That Make a Difference
The way you finish your Crochet Summer Bag can make or break the final look. Take your time with these last steps.
Weave in all your ends securely, especially on the bottom of the bag where weight will pull on loose threads. Block your finished piece gently with a spray bottle and pins if the shape has shifted during crocheting. Blocking helps even out the stitches and gives the bag a polished, professional appearance.
Consider adding a fabric lining to protect items inside and give the bag a more structured feel. A simple cotton lining sewn to match the interior dimensions takes just a little extra time but elevates the whole project. You can also add a small pocket inside the lining for your phone or keys.
Finally, attach any closures, labels, or decorative elements and give the bag one last look. If anything feels off, adjust before you take it on its first outing.

Getting Started on Your Next Crochet Summer Bag
Now you have all the tools, knowledge, and inspiration to start your own Crochet Summer Bag. Whether you choose a simple single crochet design or dive into a more advanced colorwork pattern, the most important step is the first one: picking up that hook and starting your chain.
Remember, there is no such thing as a wrong crochet project. Every bag you make teaches you something new about your tension, your preferred stitches, and your design instincts. So grab your favorite yarn, pick a pattern that excites you, and let the summer sunshine guide your stitches.
I hope this guide helps you create something you are proud to carry everywhere. Happy crocheting!