
Crochet bags Crochet Beach Bag

Why a Crochet Beach Bag Belongs in Every Summer Wardrobe
There is something deeply satisfying about carrying a bag you made with your own hands to the beach. A Crochet Beach Bag combines practical storage with the creative joy of crochet, and once you start one, you will wonder why you did not begin sooner. Whether you are heading to the shoreline, a pool day, or just running errands on a sunny afternoon, a handmade bag adds a personal touch that no store-bought option can match.
The beauty of a Crochet Beach Bag lies in its versatility. You can make it as simple or as intricate as your skill level allows. Beginners can work up a straightforward mesh stitch bag in a few afternoons, while more experienced crocheters can explore cable patterns, textured stitches, and decorative edgings. The result is always functional, always cheerful, and always entirely yours.
Choosing the Right Yarn and Hook for Your Crochet Beach Bag
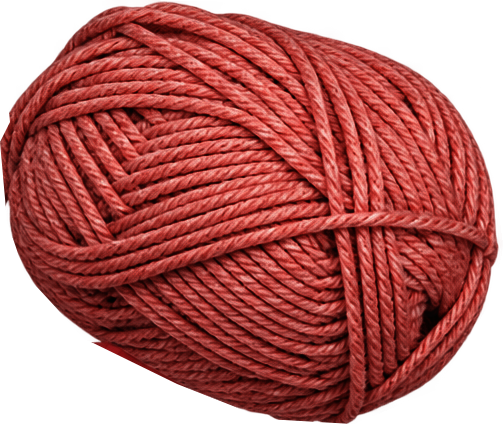
The foundation of any great Crochet Beach Bag starts with the right materials. Since a beach bag needs to be sturdy and water-resistant enough to carry towels, sunscreen, and snacks, yarn choice matters a great deal. Cotton yarn is my top recommendation for beach projects. It is strong, washable, and holds its shape well, even when wet. Look for a cotton blend or a pure cotton in a weight 4 medium or weight 5 bulky category, depending on how quickly you want to work and how structured you want the finished bag to be.
Hook size should complement your yarn weight. For a medium-weight cotton, a size H 5mm hook often strikes a good balance between tight stitches and a reasonable work pace. If you are using a bulky cotton, step up to a size K 6.5mm hook. Always check your yarn label for recommended hook sizes, but remember that you may need to adjust for tension. A tighter gauge will produce a denser fabric that resists stretching, which is exactly what you want in a bag that carries heavy items.
I also encourage you to think about color. Bright, sunny tones and ocean-inspired palettes make Crochet Beach Bags especially joyful. But do not feel limited by convention. Earthy neutrals, bold stripes, or even ombre yarns can transform a simple bag into a statement piece. The sky is really the limit when it comes to color choices.
Common Yarn Mistakes to Avoid
- Using soft wool that loses shape when wet.
- Choosing yarn that is too fine for a bag that needs structure.
- Skipping a gauge swatch and ending up with a bag that is too floppy.
- Ignoring the fiber content after repeated washing or sun exposure.
Stitch Patterns That Work Beautifully for a Beach Bag
When it comes to stitch selection for a Crochet Beach Bag, think about both beauty and durability. Simple stitches like single crochet and double crochet create a solid, reliable fabric, while shell stitches and popcorn stitches add texture without compromising strength. Mesh stitch is another popular choice because it creates a lightweight, open fabric that allows air to circulate, which is a nice bonus for a bag that lives at the beach.
I personally love working with a basic double crochet stitch for beach bags. It is quick, forgiving, and creates a fabric with plenty of body. If you want to add a little visual interest, try alternating rows of double crochet and half double crochet. The subtle change in height catches the eye and gives the bag a more polished, designed look.
For more adventurous crocheters, consider combining a solid stitch panel with a mesh panel. This creates a bag with structured sides and a ventilated front or back, which is both attractive and practical. You can also experiment with colorwork by carrying two or three yarn colors and working simple stripe patterns. Even basic stripes look vibrant in a Crochet Beach Bag.

Construction Tips: How to Build a Durable Crochet Beach Bag
Construction is where a Crochet Beach Bag either comes together beautifully or falls apart literally. The key principles are reinforcing the bottom, making the sides tall enough for real use, and attaching handles that can bear weight. Start with a foundation chain that matches your desired bag width, and work in the round or in rows depending on the shape you want.
A round bag shape is one of the easiest designs for beginners. Work in continuous spirals, increasing evenly around the base to create the bottom, then work straight up the sides until you reach your desired height. Slip stitch decreases near the top to close the opening neatly. This approach yields a bag that looks clean and requires minimal seaming.
If you prefer a more structured box shape, consider working flat panels and sewing them together. This method lets you create flat bottoms and straight sides, much like a traditional tote. For a Crochet Beach Bag meant to hold heavier items, I strongly recommend reinforcing the bottom with an extra layer of stitching or even a thin lining. A simple cotton lining sewn to the inside adds years of life to your bag.
Handles are another critical detail. You can crochet handles in the same yarn using a long chain stitch and then sew them to the inside edges of the bag. Alternatively, use leather strapping or braided cord for a more rustic look. Make sure your handles are at least a few inches wide so they do not dig into your shoulder when the bag is full. Attaching them securely with a slip stitch and weaving in the ends is essential for safety.
Quick Construction Checklist
- Determine bag dimensions and shape before casting on.
- Work a firm, stable base that resists warping.
- Choose between in-the-round and flat-panel construction.
- Reinforce the bottom with extra stitching or a lining.
- Attach handles securely with matching or contrasting yarn.
- Finish with a neatly worked border or edging.
Adding Personal Flair: Embellishments and Finishing Touches
A Crochet Beach Bag does not have to be plain. One of my favorite parts of making these bags is adding embellishments that reflect personality and style. Simple additions like a crochet border in a contrasting color, a decorative shell-stitch rim, or a small initial worked into the fabric can elevate the final piece significantly.
You can also add functional embellishments. A small crochet pocket on the inside is perfect for a phone or keys. A button closure or a simple crochet drawstring at the top keeps items secure. If you enjoy working with motifs, consider making a flower or star motif and attaching it to the side of the bag as a playful decoration.
Do not forget about blocking. Once your Crochet Beach Bag is complete, give it a good soak in lukewarm water, gently squeeze out the excess, and lay it flat on a towel to dry. Blocking evenes out the stitches, improves the overall shape, and helps the bag hold its intended dimensions. This step is especially important if your gauge has been slightly inconsistent during the work.

For crocheters who enjoy working with bags and want to see how different motifs and stitch combinations translate to bag projects, the patterns for Crochet Flower Crochet Market Bag and Crochet Flower Crochet Tote Bag offer excellent inspiration for exploring bag construction techniques and stitch variety.
Solving Common Problems When Crocheting a Beach Bag
Every crocheter runs into challenges, and a Crochet Beach Bag is no exception. One of the most common issues is a bag that stretches out over time. This usually happens when the yarn is too soft or the hook is too large for the chosen fiber. To prevent this, try working a swatch and pulling on it gently. If it stretches significantly, go down a hook size or switch to a tighter yarn.
Another frequent problem is uneven tension across the project. This can cause the bag to look lopsided or twist as you work. If you notice this, try placing a marker at the beginning of each round or row and check your stitch count frequently. Counting stitches is a small habit that saves a lot of frustration later.
Some crocheters also worry about their bags looking too homemade. The secret to a polished finish lies in the details. Neatly woven-in ends, a consistent gauge, and a well-blocked final piece make all the difference. A finished Crochet Beach Bag should look as intentional as anything you would find in a boutique.
Finally, if you are working with a lighter-colored yarn, be mindful of split yarn. Split stitches happen when the hook catches only part of the yarn loop. Slowing down and ensuring you are catching the full loop with each stitch will resolve this quickly.

Getting Started: Your First Crochet Beach Bag Awaits
Starting a Crochet Beach Bag project is easier than you might think. All you need is yarn, a hook, a yarn needle, and a little patience. If you are a beginner, begin with a simple double crochet or single crochet pattern and a medium-weight cotton yarn. Choose a color that makes you smile every time you see it, because that bag will be with you through plenty of sunny days.
Set aside a cozy spot, put on some music or a podcast, and let the rhythm of your stitches carry you through. The first few rows might feel slow, but once you find your flow, the work will fly by. Before long, you will be holding a finished bag that you created with your own two hands, ready to carry your treasures to the shore.
Remember, there is no single right way to make a Crochet Beach Bag. Every choice you make, from yarn to stitch to color, shapes a unique result. Trust your instincts, learn from any mistakes along the way, and enjoy the process as much as the finished piece. The beach is calling, and your handmade bag is waiting.
Happy crocheting, and may your summer be full of sunshine, soft yarn, and bags you are proud to carry.