
Crochet amigurumi, Fox

Introduction to Crochet Amigurumi Fox
There is something truly magical about turning a simple ball of yarn into a cute, huggable creature. Crochet amigurumi has captured the hearts of crafters around the world, and the fox pattern is one of the most beloved designs in this charming genre. Whether you are a complete beginner or a seasoned crocheter looking for a fun weekend project, an amigurumi fox makes an irresistible addition to any handmade collection.
Amigurumi, the Japanese art of knitting or crocheting small stuffed yarn creatures, relies on tight, even stitching and seamless construction. The fox pattern is especially rewarding because its pointed ears, fluffy tail, and expressive face come together to create a character full of personality. I have seen countless crafters fall in love with this shape the first time they complete one, and I completely understand why.
Choosing the Right Yarn and Hook for Your Crochet amigurumi Fox
Selecting the right materials is the foundation of any successful amigurumi project. For a crochet amigurumi fox, you will want a medium-weight yarn, often labeled as worsted weight or size 4. This weight gives you enough bulk to create a sturdy stuffed toy without making it overly bulky or heavy.
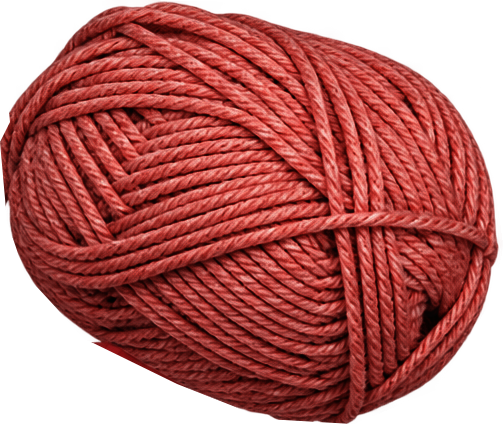
When it comes to color, traditional orange or reddish-orange yarn works beautifully for the fox body, while white or cream yarn is perfect for the chest, muzzle, and tip of the tail. Some crocheters also love using a slightly darker shade of orange for shading depth, or they opt for a fun twist like a multicolor speckled yarn that adds texture to the finished piece.
As for hook size, a 4.0 mm to 4.5 mm hook generally pairs well with worsted weight yarn. The key is to crochet tightly so that the stuffing does not show through between stitches. If you find your stitches are too loose, try going down half a hook size. Always check your gauge before starting the full project.

Key Techniques for Crocheting the Fox Shape
The body of a crochet amigurumi fox is worked in continuous spiral rounds using single crochet stitches. This technique creates a smooth, seamless surface that is perfect for stuffing. You start with a magic ring, increase evenly around to form the head, then gradually decrease to shape the snout and face.
One of the most important skills for amigurumi is working tight, even tension. Unlike blankets or scarves where loose stitches might be acceptable, amigurumi requires consistent tension to hold its shape and support the stuffing inside. If your tension varies too much, the fox may end up lopsided or uneven.
Ears are typically worked flat and then sewn onto the head. The tail is another feature piece that often requires a bit of patience to shape properly. Many amigurumi fox patterns call for a cone-shaped tail worked in the round and filled with stuffing before being attached to the body. Take your time with these smaller components, as they really bring the character to life.

Adding Facial Features and Personality
The face is where your crochet amigurumi fox truly comes alive. Most patterns call for black safety eyes or embroidered eyes, a small black nose, and subtle stitching to suggest cheeks and eyebrows. Safety eyes are a popular choice because they are secure and easy to insert, but some crocheters prefer the hand-stitched look of embroidered features.
If you are making this project for a very young child, embroidered features may be the safer option since safety eyes could potentially be pulled loose. Whichever method you choose, take care to position the eyes symmetrically on the head. A misplaced eye can give the fox an unintended goofy or confused expression.
I always recommend placing the eyes before you finish stuffing the head, as it is much easier to work around them when the piece is still open. Mark the positions with a removable stitch marker or a pin to ensure perfect placement on both sides.
Stuffing and Finishing Your Crochet amigurumi Fox
Stuffing is where patience pays off. Use polyester fiberfill and distribute it evenly throughout the body, making sure to push stuffing firmly into the ears, the tail, and the snout area. Under-stuffed amigurumi will look limp and saggy, while over-stuffing can cause the stitches to bulge or even burst.
A good technique is to stuff the body in sections, starting from the bottom and working your way up. Use the blunt end of a pencil or a chopstick to press the stuffing into tight corners like the ears and the base of the tail. Once the fox is fully stuffed, close the opening using a mattress stitch or an invisible seam, pulling the yarn tail through the remaining stitches and tightening securely.

Common Mistakes and How to Avoid Them
Even experienced crocheters run into challenges with amigurumi. One of the most common mistakes is crocheting too loosely, which causes the stuffing to peek through. If this happens to you, try using a smaller hook or consciously tightening your stitches as you work each round.
Another frequent issue is uneven shaping, particularly in the head and snout area. Keeping a close eye on your increase and decrease counts is essential. If your pattern calls for a specific number of rounds before and after a shaping change, resist the urge to skip ahead. Each round contributes to the overall form.
Some crocheters also struggle with color changes, especially when switching from the body color to the white chest or muzzle section. To keep your color transitions neat, weave in the yarn tails securely and work a few stitches with each color before cutting and starting the next.
Adapting Your Crochet amigurumi Fox for Custom Creations
One of the wonderful things about amigurumi is how adaptable it is. Once you have mastered the basic fox pattern, you can experiment with different color combinations, add accessories like a tiny scarf or hat, or even scale the pattern up or down to create a family of foxes in different sizes.
If you enjoy working with animal amigurumi patterns, you might also want to explore other creature designs. For instance, a Crochet amigurumi, Koala offers a completely different silhouette and stitching challenge, while a Crochet amigurumi, Bear provides a wonderfully rounded shape that is great for practicing your stuffing and seaming skills. Each animal pattern builds on the same foundational techniques, so every project you complete makes you a stronger amigurumi maker.
Consider trying seasonal color variations for your fox as well. A pastel-toned fox can look lovely for a spring nursery gift, while deeper burgundy or rust tones make a cozy autumn decoration. The flexibility of this pattern means you can create a whole woodland collection over time.
Getting Started with Your First Crochet amigurumi Fox
Now that you have an overview of the materials, techniques, and finishing tips, it is time to cast on and begin your first crochet amigurumi fox. Start with a simple, well-tested pattern, and do not worry about making it perfect on the first try. Every amigurumi project teaches you something new about tension, shaping, and stuffing.
Remember that the charm of handmade amigurumi lies in its slight imperfections. A slightly crooked ear or a mismatched eye gives your fox its own unique character. Embrace the process, enjoy the rhythm of the stitches, and before long you will have a lovely little fox sitting proudly on your shelf or ready to be gifted to someone special.
I hope this guide gives you the confidence to pick up your hook and yarn and create something wonderful. Happy crocheting, and may your first amigurumi fox be everything you dreamed it would be.