
Crochet Flower Crochet Spring Bouquet

There is something deeply satisfying about turning a simple ball of yarn into a blooming crochet flower. Whether you are drawn to the softness of a cream rose or the playful charm of a pink bloom, crochet flowers let you capture the beauty of spring all year round. In this guide, I am going to walk you through everything you need to know to create your very own crochet flower spring bouquet, from selecting the right materials to arranging a finished wreath that looks like it just stepped out of a garden.
Why Crochet Flowers Are the Perfect Spring Project
Spring and crochet go hand in hand. The season inspires freshness, color, and renewal, and few projects capture that spirit quite like a bouquet of handmade crochet flowers. Unlike live blooms that wilt after a week, a crochet flower bouquet stays vibrant forever. You can display it on a mantle, hang it on a wall, or gift it to someone who deserves a little extra brightness in their life.
One of the best things about making crochet flowers is their versatility. A single motif can be worked in dozens of sizes and colors, and the techniques range from beginner-friendly to wonderfully intricate. If you are new to crochet, starting with a simple five-petal flower is a gentle introduction. If you have more experience, you can challenge yourself with layered roses, ruffled blossoms, or even realistic-looking blooms.
Choosing Yarn and Hook for Your Crochet Flower Spring Bouquet
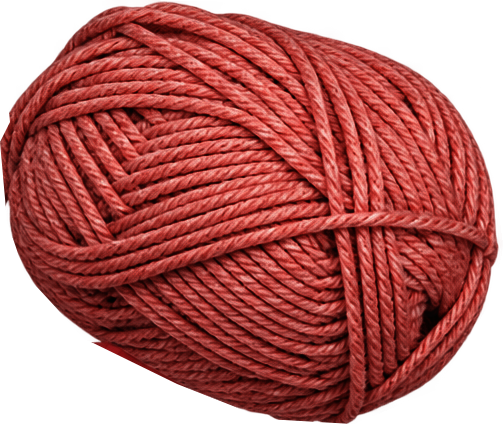
The secret to beautiful crochet flowers starts long before you make your first stitch. It begins with choosing the right yarn. For a spring bouquet, I love working with medium-weight yarn, sometimes called worsted weight, because it gives you enough body to hold the shape of a petal without being too bulky.
Cotton blends are a wonderful choice for flowers because they hold their form well and have a slight softness that mimics real petals. Acrylic yarn is budget-friendly and comes in every color under the sun, making it ideal if you want to mix and match shades. If you want a more delicate, vintage feel, a lightweight yarn such as a fingering or sport weight can give your flowers an airy, romantic quality.
As for hook size, the general rule is to use a hook one to two sizes smaller than what the yarn label recommends. This creates a tighter fabric that helps each petal hold its shape. For worsted-weight yarn, I usually reach for a 4mm to 4.5mm hook when working crochet flowers. That said, always check your gauge, because tension plays a huge role in how your finished blooms look.
Color palette ideas for a spring bouquet
- Soft cream and white for an elegant, classic look
- Blush pink and sage green for a romantic garden feel
- Sunshine yellow and lavender for a cheerful, playful bouquet
- Deep magenta and teal for a bold, modern arrangement
Essential Stitches and Techniques for Crochet Flowers
Most crochet flowers rely on a handful of foundational stitches. You do not need to be an expert to make stunning blooms, but understanding these basics will make the process much smoother.
The chain stitch is the backbone of nearly every flower. It forms the starting round and often becomes the outer edge of a petal. The single crochet gives you a tight, structured fabric that works well for the center of a bloom. The double crochet creates taller petals with lovely texture, and the slip stitch is essential for joining rounds and closing up your work neatly.
Increasing and decreasing are the techniques that give a flower its shape. By working extra stitches around a small section, you can create a curved petal that opens up beautifully. Decreasing helps you narrow the base of a bloom or shape the calyx where the petals meet.

Working in the round for symmetrical blooms
Most flowers are worked in rounds rather than rows. Start with a magic ring or a chain circle, and work your stitches into that center. Moving outward in concentric rounds lets you build a dome shape that naturally mimics a real flower. Pay attention to where you place your increases, because concentrating them on one side will cause your flower to curl, while spreading them evenly creates a flatter, more open bloom.
Designing Your Crochet Flower Spring Bouquet
Now for the fun part: designing your arrangement. A crochet flower spring bouquet is as much about creativity as it is about technique. There is no single right way to build one, which is exactly why I love this project so much.
Start by deciding on the size and shape of your finished piece. A wreath form is one of the most popular options because it gives you a natural frame to attach your blooms. You can use a foam wreath base, a straw wreath, or even a simple ring made from wire or cardboard. Covering the base with a layer of green yarn or felt can give it a polished, finished look.
Next, think about the variety of flowers you want to include. A bouquet made from just one type of bloom can be stunning, but mixing flowers adds depth and visual interest. Consider pairing larger statement blooms like roses or peonies with smaller filler flowers such as buds, daisies, or lavender sprigs.
Arranging your blooms
Before you attach anything permanently, lay your crochet flowers out on the wreath base. Play with the spacing and orientation until you find an arrangement that pleases you. Some people prefer a dense, garden-style packing where blooms overlap, while others like a more airy arrangement with visible space between each flower.
When you are ready to attach the flowers, use a yarn needle and a length of matching yarn to stitch each bloom securely to the base. For a more dimensional effect, you can add a small amount of batting or fabric filler behind each flower to give it a puffier look. This is especially effective for roses and layered blooms.
Adding finishing touches
- Attach small leaves made from green yarn to fill gaps
- Add a ribbon bow at the bottom for a gift-ready finish
- Use fabric glue to secure any loose ends or stubborn petals
- Spritz with a light fabric starch for extra hold and structure

Common Mistakes and How to Fix Them
Even experienced crocheters run into trouble with crochet flowers from time to time. Here are a few common pitfalls and the simple fixes that can save your project.
The first issue I see often is petals that are too tight or too loose. If your flowers look like small, stiff discs instead of graceful blooms, your tension is probably too tight. Try using a larger hook or loosening your grip slightly. On the other hand, if your petals are so floppy they lose their shape entirely, you may need a tighter tension or a smaller hook.
Another common problem is asymmetry. One petal looking different from the rest usually comes down to inconsistent stitch counts or uneven increases. Counting your stitches at the end of each round and using a stitch marker can help you catch discrepancies early.
Dealing with uneven edges
Crochet flowers sometimes develop wobbly edges, especially when the stitch count does not divide evenly into the round. A good workaround is to use a combination of increases and decreases to distribute the excess stitches more evenly. It takes a bit of experimentation, but the results are worth it.
Inspiration for Your Next Crochet Flowers Project
The beauty of crochet flowers is that there is always something new to try. Once you have mastered a basic bloom, challenge yourself with different shapes, textures, and color combinations. You might try a sunflower with a braided center, a tulip with pointed petals, or a ranunculus with layered ruffles.
A spring bouquet is not just a decoration, it is a celebration of color and craft. Whether you display your finished piece in your home, bring it to a gathering, or wrap it up as a heartfelt gift, a handmade crochet flower arrangement carries a warmth that store-bought items simply cannot match.

Getting Started with Your Own Crochet Flower Spring Bouquet
The best time to start is now. Grab some yarn in your favorite spring colors, pick up a hook, and let your creativity flow. There is no need to follow a rigid pattern if you would rather experiment freely, and there is no shame in starting with a simple design and building up your skills over time.
Remember that every crochet flowers project is a learning experience. Your first bouquet might not look exactly how you envisioned it, and that is perfectly okay. Each bloom you make teaches you something new about tension, shape, and color, and soon you will be creating arrangements that are entirely your own.
I hope this guide has inspired you to pick up your hook and try your hand at a crochet flower spring bouquet. The joy of watching a flat circle of yarn transform into a three-dimensional blossom is something every crocheter deserves to experience. Happy stitching, and may your spring be filled with beautiful, handmade blooms.