
Crochet Flower Crochet Crop Top

Why a Crochet Flower Crop Top Is the Perfect Summer Project
There is something magical about combining the charm of crochet flowers with the playful energy of a crop top. If you have been looking for a project that lets your creativity bloom, this is it. A crochet flower crochet crop top pairs well with jeans, shorts, or even a flowing skirt, and it gives you a chance to experiment with texture, color, and shape. Whether you are a beginner who has just mastered the basic stitches or an experienced maker ready to tackle something more intricate, this guide will walk you through everything you need to know.
The beauty of a crochet flower crop top lies in its versatility. You can make it as simple or as detailed as you like. Some designs feature large floral motifs stitched directly onto a fitted base, while others use individual flower motifs joined together panel by panel. I love how this project lets you play with yarn weights and hook sizes to get the look that matches your personal style.
Choosing the Right Yarn and Hook for Your Crop Top
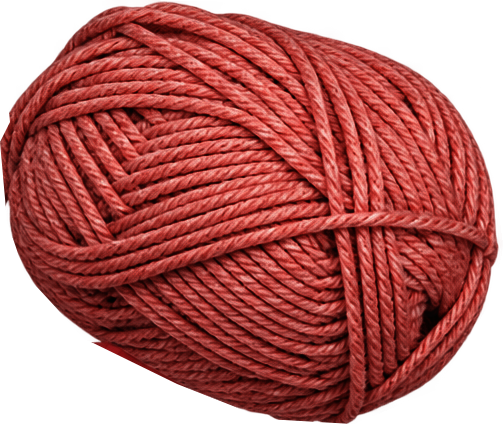
One of the most important decisions when starting any crochet project is selecting the right materials. For a crochet flower crop top, I recommend using a lightweight yarn such as a size 4 worsted weight or even a finer cotton yarn if you want a more breathable garment for warm weather. Cotton and cotton blends work beautifully because they have a nice drape and hold their shape well, which is essential for a fitted top.
When it comes to hook size, a 5mm hook usually pairs well with worsted weight yarn, but always check your yarn label for the recommended hook size. If you want your crochet flowers to have more dimension and a looser, airier feel, consider going up half a size. For tighter, more defined flower petals, stick with the recommended size or go down slightly.
Yarn Color Ideas
- Soft pastels like blush pink, lavender, and mint green give a romantic, feminine feel.
- Bright and bold colors such as coral, sunflower yellow, or turquoise create a fun, playful vibe.
- Monochrome schemes in shades of beige, cream, and tan work well for a subtle, earthy boho look.
- Two-color contrast, like a dark green base with bright pink flowers, can make your floral motifs really pop.
Do not be afraid to mix yarn textures either. A silky mercerized cotton for the base and a slightly fuzzy yarn for the flowers can add wonderful visual interest. The key is to make sure both yarns are compatible in weight so your tension stays consistent throughout the project.

Essential Stitches and Techniques for the Flower Motifs
The heart of any crochet flowers pattern involves a combination of basic stitches that you probably already know. Single crochets form the foundation of the petals, while double crochets and treble crochets create the height and fullness that make each flower look three-dimensional. Cluster stitches and popcorn stitches are also popular choices for adding that textured, petal-like quality.
To get started with your flower motifs, you will typically work in rounds. Begin with a magic ring or a chain ring, then increase stitches around the center to form the base of the flower. From there, you will work petal shapes by making clusters of stitches into the same point, then slipping stitch or single crochet to separate each petal.
Basic Flower Round Breakdown
- Start with a magic ring or chain-2 ring.
- Work 6 double crochets into the ring and slip stitch to close.
- In the next round, work 2 double crochets into each stitch around to increase.
- For petals, work a cluster of 3 double crochets into one stitch, then skip a stitch and repeat.
- Slip stitch into the top of the first stitch to finish the round.
This is a very simplified version, but it gives you the idea. Once you have the basic flower shape down, you can modify the number of petals, the height of the stitches, and the type of increases to create entirely different flower varieties. Rounded petals, pointed petals, layered petals, and even ruffled edges are all achievable with small adjustments to the pattern.

Constructing the Crop Top Base
Once you have your crochet flowers ready, the next step is building the base of the crop top. There are several approaches you can take depending on your skill level and the look you are going for.
The simplest method is to crochet a simple panel in half double crochet or single crochet stitches that fits comfortably around your torso. You can measure your body and add ease, then work the panel from the bottom up until it reaches the desired length for a crop top. After the base panel is complete, you can attach the flower motifs directly onto the surface using single crochet or slip stitch through both layers.
Another popular method is to crochet each flower motif as a separate square or rectangle, then join them together like a granny square blanket but shaped into a top. This approach lets you control the placement of each flower exactly where you want it. It also makes it easier to manage the project in smaller, more manageable pieces.
Sizing Tips for a Flattering Fit
- Take accurate measurements of your bust, waist, and the desired crop length.
- Remember that crochet stretches, so work slightly snug if you want a tighter fit.
- Add a few extra inches to the length if you plan to wear the top layered over a tank top.
- Always make a gauge swatch before cutting any yarn to ensure your dimensions match the pattern.
A common mistake many crocheters make is underestimating how much a finished top will stretch at the sides and hem. If you are unsure about the fit, make a muslin version in a cheap acrylic yarn first. This saves time and yarn in the long run.

Finishing Touches and Styling Your Crochet Flower Crop Top
Finishing is where your project truly comes to life. After assembling the base and attaching your crochet flowers, you will want to block the finished piece to even out the stitches and help the floral motifs lay flat. Blocking also gives the garment a polished, professional look that makes all the difference.
To block your crop top, soak it in cool water with a gentle detergent, squeeze out the excess moisture gently without wringing, and lay it flat on a towel. Pin the shoulders, sides, and hem to the desired dimensions, and let it dry completely. If your yarn is cotton or a plant-based blend, you can use steam blocking as well, which helps set the stitches even more.
Adding Extra Details
Consider adding a thin elastic casing at the back or sides for a more secure fit, especially if the top is meant to be worn strapless or with minimal support. You can also add small crochet leaves or vine motifs alongside your flowers to create a more botanical, garden-inspired design. A simple chain stitch vine running along the neckline or hem ties the whole piece together beautifully.
For those who love a bit of sparkle or texture, adding a few beads to the center of each flower or using a metallic yarn for the petal tips can elevate the design. Just make sure any added embellishments are securely attached and will not irritate the skin.
Common Mistakes and How to Avoid Them
Even experienced crocheters run into trouble from time to time. Here are a few common issues I have noticed in projects like this and some tips to help you navigate them smoothly.
- Inconsistent tension across flower motifs can make the finished top look uneven. Try to maintain the same tightness throughout every petal and every round.
- Attaching flowers too early before the base has stabilized can cause warping. Let the base panel firm up a bit before you start sewing on motifs.
- Using yarn that is too thick for the crop top silhouette can make the garment bulky and heavy. Lightweight yarns give you a more comfortable, wearable result.
- Forgetting to account for the stretch of the fabric when sizing can lead to a top that is either too tight or too loose. Always factor in about 10 to 15 percent ease for a comfortable fit.
Remember, every mistake is a learning opportunity. If something does not turn out the way you envisioned it, you can unravel and try again. That is part of the joy of crochet. There is no permanent error, only a chance to improve.
Getting Started on Your Own Crochet Flower Crop Top
Now that you have an idea of what goes into making a crochet flower crop top, it is time to gather your supplies and begin. Start with a simple flower pattern and a straightforward base panel. As your confidence grows, you can move on to more elaborate designs with layered petals, intricate color changes, and decorative borders.
The most important thing is to enjoy the process. Crochet is a skill that rewards patience, and every project you complete teaches you something new. Your first crop top may not be perfect, and that is completely okay. With each flower you stitch and each row you complete, you are getting closer to a handmade piece that is truly one of a kind.
I hope this guide has inspired you to pick up your hook and start creating. The world of crochet flowers is vast and full of possibilities, and a crop top is just one of the many wonderful things you can make. Happy crocheting, and may your stitches always be even and your flowers always bloom!