
Crochet clothes, Halter Top

Crochet Clothes: Everything You Need to Know About Making a Halter Top
There is something deeply satisfying about wearing something you made with your own hands, and when it comes to crochet clothes, a halter top sits right at the top of the list for both style and wearability. Whether you are a beginner looking for your first wearable project or an experienced crocheter wanting to expand your wardrobe, a halter top is a forgiving and rewarding pattern to tackle. The open shoulders and simple construction mean fewer seams to worry about, and the beauty of crochet fabric gives you a relaxed, bohemian look that is hard to replicate with knit or woven textiles.
In this guide, I will walk you through everything from selecting the right yarn and hook to understanding the stitch choices that give your halter top its shape and structure. We will also look at sizing considerations, finishing techniques, and practical tips that will help you avoid the most common pitfalls. By the end, you should feel confident enough to cast on your very own handmade halter top.
Choosing the Right Yarn and Hook for Your Halter Top
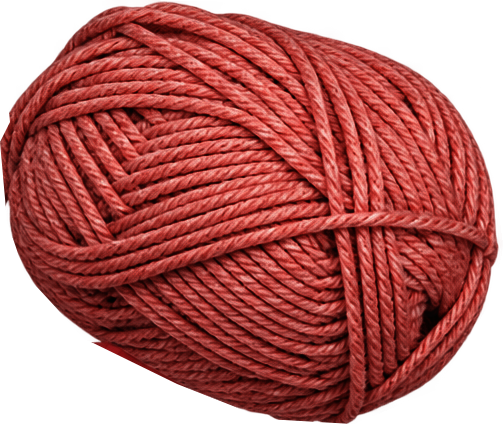
The foundation of any successful crochet clothes project is the material you start with, and a halter top is no exception. For a lightweight, breathable garment suited to warm weather, I recommend a cotton or linen blend yarn in a DK or worsted weight. Cotton is especially wonderful because it has a nice drape, breathes well against the skin, and holds its shape after blocking. If you are aiming for a more structured or layered look, a wool blend or acrylic yarn can give you additional body and warmth.
When it comes to hook size, the general rule is to go one or two sizes larger than what the yarn label recommends for garments. This helps create a fabric with enough give and drape to feel comfortable when worn. For a worsted-weight cotton, I have had good results with a 5mm to 5.5mm hook, but always check your gauge.
Gauge is critical in crochet clothes because unlike a blanket or a bag, a garment needs to fit specific body measurements. Before you start the main body of your halter top, crochet a small swatch, block it, and measure your stitches and rows per inch. If your gauge is off, the entire fit can change dramatically.

Understanding the Halter Top Pattern Structure
A typical crochet halter top is constructed in a few major sections: the body, the neckline opening, and the straps. The body is usually worked flat in rectangles or trapezoids, then joined at the sides and shoulders. The neckline is either left open or shaped with decreases, and the straps are often worked separately and attached or integrated into the body.
For the main fabric, a simple stitch like double crochet or treble crochet works beautifully. These taller stitches create an open, lacy feel that is ideal for a halter top because it allows airflow and creates that characteristic crochet texture. If you want more coverage and structure, half double crochet is a solid middle ground. Some patterns incorporate mesh panels or pineapple stitches for visual interest, but as a starting point, a solid block of double crochet is both forgiving and flattering.
One thing I appreciate about halter top patterns is that they are very adaptable. You can easily adjust the length, width, and neckline depth to suit your taste. If you are working from a chart or diagram, pay close attention to how the increases and decreases are placed. A small miscount can shift the entire shape of the garment.

Construction Tips and Step-by-Step Guidance
When you begin constructing your halter top, start with the main body panels. Most patterns call for two identical rectangles worked from the bottom edge upward. Work your chosen stitch across until you reach the desired width, then chain up and turn to begin the next row. Continue until the piece measures from your waist to where you want the top to end, whether that is a crop length or a full-length bodysuit style.
Joining the pieces is where precision matters. Sew the side seams together using a slip stitch or a yarn-over mattress stitch, depending on how seamless you want the finish to be. For crochet clothes that will be worn against the skin, a smooth invisible seam is worth the extra effort. After the sides are joined, you will shape the neckline by working decreases along the shoulder and chest edges.
The straps are another area where you have options. Some crocheters prefer to pick up stitches along the shoulder edge and work the straps in the same round as the body, creating a seamless look. Others prefer to crochet the straps separately as narrow rectangles and sew them on. Both methods are valid; the separate strap approach gives you more control over thickness and length.
A common mistake in crochet clothes construction is not accounting for stretch and ease. Crochet fabric does stretch horizontally but not vertically, so if your halter top feels tight across the chest, it might be your gauge or your stitch choice rather than a sizing issue. Always try on the garment or pin the seams before finalizing the neckline.
Finishing Touches and Styling Ideas
Blocking is the single most transformative step you can take with a finished halter top. Pin the garment to the correct dimensions on a blocking board and mist it with water, or use a steam iron held above the fabric. Blocking even out the stitches, relax the edges, and give the garment a polished, professional look that elevates the entire piece from handmade to handmade-with-intention.
For finishing, consider adding a thin elastic cord along the neckline if you want a more secure fit, or leave the edges raw for a relaxed, bohemian aesthetic. Some crocheters add small buttons or toggles at the back neck for adjustability. Shell edges or picot finishes along the strap edges add a delicate, feminine touch that pairs especially well with boho fashion.
When styling your finished piece, a crochet halter top looks stunning paired with high-waisted jeans, a flowing midi skirt, or even tucked into tailored shorts for a festival-ready look. The versatility of crochet clothes means your halter top can transition from a casual weekend outfit to a statement piece at a summer gathering with very little effort.

Common Mistakes and How to Troubleshoot Them
One of the most frequent issues with crochet clothes projects is uneven tension, which can cause the fabric to pucker or distort. If you notice this happening, try relaxing your grip on the hook and yarn. Some crocheters find it helpful to rest the hook in their palm rather than gripping it tightly, allowing the yarn to flow more naturally through their fingers.
Another common problem is mismatched stitch counts at the end of a row, which leads to a diagonal shift in the fabric. To catch this early, count your stitches at the end of every single row. If you are one stitch short or over, do not rip back immediately; instead, note the discrepancy and work a corrective stitch in the next row or use a crochet hook to add or remove a stitch along the edge.
Sizing errors are also prevalent, especially when crocheters skip the gauge swatch. If your halter top turns out too small after blocking, the issue is almost always gauge-related. If it is too large, working a tighter stitch or using a smaller hook can help compensate in future projects.
Frequently Asked Questions About Crochet Halter Tops
What yarn weight is best for a crochet halter top?
For a standard halter top, worsted weight or DK weight yarn in a breathable fiber like cotton or a cotton blend is ideal. Thinner yarns like sport weight will give you a more lacy, delicate look, while bulky yarn will create a chunkier, more statement piece.
How long does it take to crochet a halter top?
Depending on your skill level and the complexity of the pattern, a crochet halter top can take anywhere from a few evenings to a full weekend. Simple designs worked in double crochet with minimal shaping tend to go faster, while more intricate stitch patterns will naturally take longer.
Can I make a halter top if I am a beginner?
Absolutely. A halter top is one of the more approachable wearable projects because it requires minimal shaping compared to other garments like sweaters or cardigans. Start with a simple rectangle body and basic straps, and you will build confidence quickly.
Do I need to block my finished halter top?
Blocking is highly recommended for crochet clothes, especially garments. It helps set the shape, even out the stitches, and gives the piece a more refined appearance. Even a simple pin-and-mist block can make a noticeable difference.
Ready to Start Your Next Crochet Clothes Project
Making your own halter top is one of the most rewarding ways to explore the world of crochet clothes. The combination of simplicity in construction with the beauty of handmade texture makes this project accessible to crocheters of all levels. Once you have completed your first halter top, you will find it easy to experiment with different yarn colors, stitch patterns, and neckline variations.
If you enjoyed this guide and would like to explore more crochet clothing projects, check out my Crochet Tank Top pattern for another beginner-friendly wearable, or browse my collection of Crochet Crossbody Bag patterns to complete your handmade summer wardrobe with a coordinating accessory.
Grab your yarn, pick your hook, and let the rhythm of the stitches carry you into a new handmade creation. Your halter top is waiting.