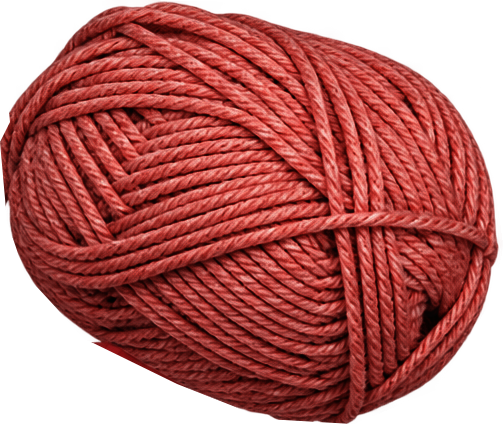
There is something so genuinely satisfying about turning a couple of balls of yarn into a warm, squishy hat you can actually wear out the door. If you’ve been intimidated by hats in the past—maybe thinking you have to wrestle with working in tiny rounds or keep track of complicated crown decreases—take a deep breath.
This cozy striped beanie is worked completely flat as a simple rectangle, then seamed together and cinched at the top. If you can make a chain and work a basic half double crochet, you are more than ready to make this.
Grab a hot mug of coffee or tea, put on your favorite comfort show, and let’s make your new favorite winter hat!
Why You’ll Love This Pattern
Beginner-Friendly: No tricky crown math or working in a magic circle.
That “Knit-Look” Ribbing: By working into the back loops only, we get that gorgeous, stretchy ribbed texture that looks just like store-bought knitwear.
Classic Fold-Over Brim: Extra warmth over your ears and a super cozy fit.
Great Stash Buster: The bold burgundy and cream stripes give it a vintage collegiate look, but feel free to use any colors you love (or go completely solid!).
What You’ll Need
Yarn: Worsted weight (Category 4) or light Bulky yarn (Category 5). You'll need about 1 ball of deep burgundy/wine and 1 ball of cream/off-white (approx. 180–200 yards total).
Crochet Hook: 6.0 mm (US J/10) or size needed to get a nice, flexible drape (not too stiff!).
Yarn Needle (Tapestry Needle): For seaming the hat and cinching the crown.
Scissors
Tape Measure
Pattern Notes & Sizing
Skill Level: Easy / Confident Beginner
Sizing: Adult Standard (fits heads 20"–22" circumference).
Customizing Size:
The length of your starting chain determines the height of your beanie (including the folded brim).
The number of rows you work determines the width/circumference (how snugly it fits around your head).
Color Changes: Change colors every 2 rows to keep your yarn neatly carried along the edge, meaning fewer ends to weave in at the end!
Abbreviations (US Terms)
ch: chain
hdc: half double crochet
blo: back loop only
st(s): stitch(es)
sl st: slip stitch
Step-by-Step Pattern Instructions
1. Foundation & First Row
Using Burgundy yarn:
Foundation Chain: Ch 40 (or chain until your piece measures around 11.5 to 12 inches long for a nice deep fold-over brim).
Row 1: Starting in the 2nd ch from your hook, work 1 hdc into each chain across. Turn. (39 sts)
2. The Ribbed Texture (Working in the Back Loop)
Row 2: Ch 1 (does not count as a st), work 1 hdc in the BLO (back loop only) of the first stitch and every stitch across.
(Tip: To get nice, neat edges, I love working the very last stitch of the row through
On the final stitch of Row 2, stop just before the last yarn over. Pull your Cream yarn through to complete the stitch. Turn.
3. Working the Striped Body
Rows 3–4 (Cream): Ch 1, 1 hdc in the BLO of each stitch across. At the end of Row 4, switch back to Burgundy. Turn.
Rows 5–6 (Burgundy): Ch 1, 1 hdc in the BLO of each stitch across. At the end of Row 6, switch back to Cream. Turn.
Repeat this 2-row color sequence until your flat ribbed piece measures approximately 18 to 19 inches unstretched (usually around 40–44 rows total). Ribbing has plenty of stretch, so you want it slightly smaller than your actual head circumference so it stays snug.
Fasten off your working yarn, leaving a long tail (around 18 inches) for seaming.
Assembling Your Beanie
Now comes the fun part where our flat rectangle magically turns into a beanie!
Step 1: Seam the Sides
Fold your rectangle in half with the short ends together (right sides facing in). Using your yarn needle and tail—or using your crochet hook with slip stitches—seam the two short edges together from bottom to top. You now have a ribbed tube.
Step 2: Cinch the Crown
Turn the tube inside out. Thread your tapestry needle with a scrap piece of matching yarn. Weave the needle in and out through the very top edge of the tube, catching the tops of the rows all the way around.
Once you’ve gone all the way around, gently pull the yarn tight like a drawstring to close up the top hole. Secure it tightly with a couple of strong knots inside the hat, and weave in your ends securely.
Step 3: The Finishing Touch
Turn your hat right-side out, fold up the brim by about 2.5 to 3 inches, and adjust the shape.
(Optional: If you want extra winter flair, feel free to pop a fluffy faux-fur or yarn pom-pom on top!)
That’s It—You Made a Beanie!
Try it on and admire your handiwork. There’s really nothing quite like the feeling of wearing something you made with your own hands.
If you make one using this pattern, we’d love to see it! Share your finished piece in the comments below or tag us on social media with #CrochetMake. Happy hooking!